The Bouncer Advanced Configuration
Ever been in trouble with one of these guys? Well, this module have more or less the same role, and he will try his best to piss your users off until they meet your requirements.
This feature is most suited for small businesses and folks running a closed-door blog between friends or coworkers.
Notes
All Bouncer settings, without exception, are only valid for users authenticating through WSL Widget.
Users authenticating through the regulars Wordpress Login and Register pages with their usernames and passwords WILL NOT be affected.
Available settings
- Enable/Disable Registration
- Enable/Disable Authentication
- Profile Completion
- Users moderation
- Users roles
- Restrictions (by emails, domains, profiles urls)
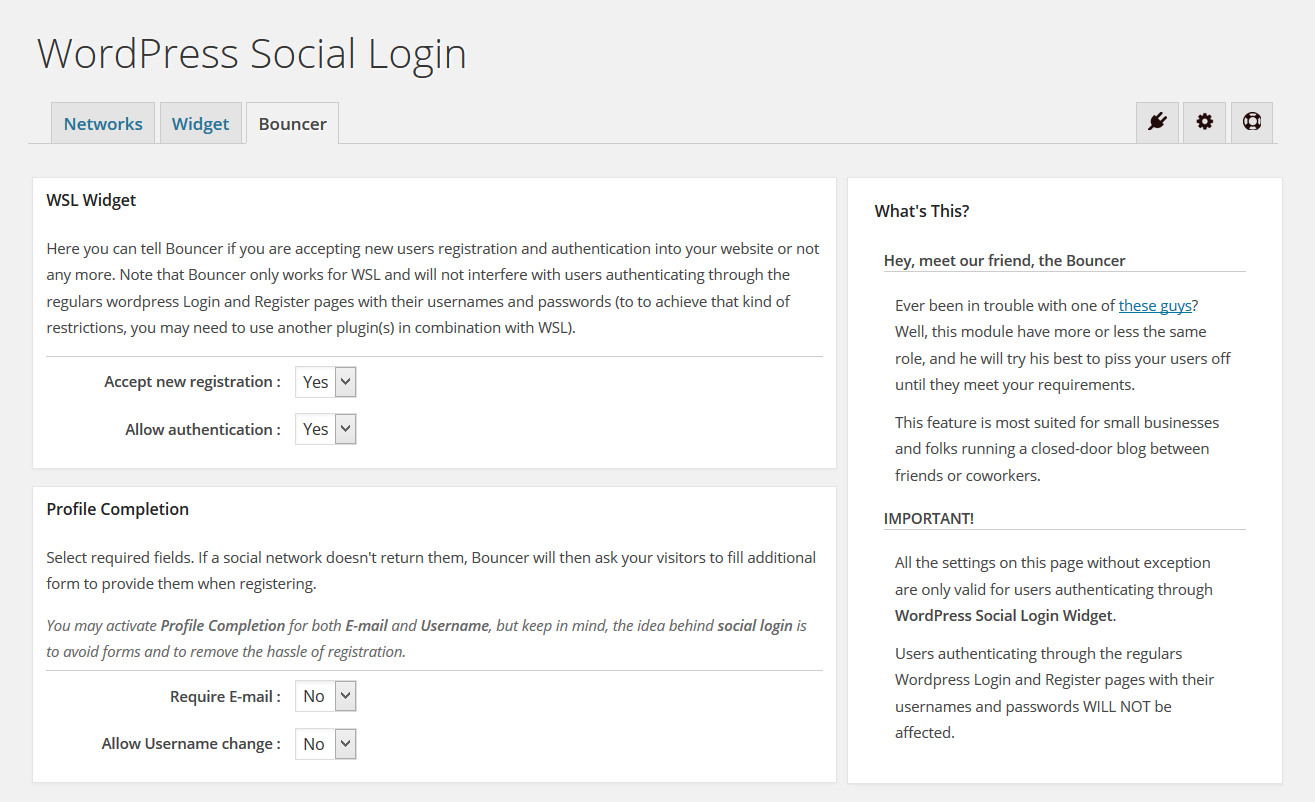
1. WSL Widget
Here you can tell Bouncer if you are accepting new users registration and authentication into your website or not any more. Note that Bouncer only works for WSL and will not interfere with users authenticating through the regulars wordpress Login and Register pages with their usernames and passwords (to to achieve that kind of restrictions, you may need to use another plugin(s) in combination with WSL).
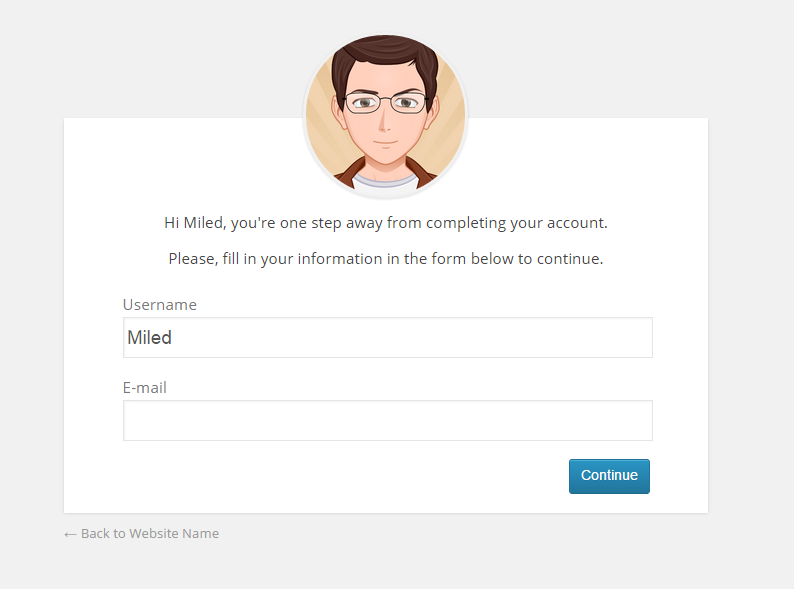
2. Profile Completion
Select required fields. If a social network doesn't return them, Bouncer will then ask your visitors to fill additional form to provide them when registering.
You may activate Profile Completion for both E-mail and Username, but keep in mind, the idea behind social login is to avoid forms and to remove the hassle of registration.
3. Users Moderation
User Moderation will define how Bouncer should behave with new registered users:
- None: No moderation required.
- E-mail Confirmation: New users will need to be confirm their e-mail address before they may log in.
- Admin Approval: New users will need to be approved by an administrator before they may log in.
Notes
1. Both Admin Approval and E-mail Confirmation requires Theme My Login Plugin to be installed.
2. Theme My Login, is a free and open source plugin and WordPress Social Login User Moderation was purposely made compatible with it because it provides a solid User Moderation module and there is no point to reinvent the wheel.
3. In order for this to work correctly, you will need to go to Theme My Login settings, then enable User Moderation and set Moderation Type to the same thing as the box bellow.
4. Membership level
Here you can define the default role for new users authenticating through WSL. Please, be extra carefull with this option, you ay be automatically giving someone elevated roles and capabilities. For more information about WordPress users roles and capabilities refer to http://codex.wordpress.org/Roles_and_Capabilities.
Notes
1. If User Moderation is set to Admin Approval then Membership level will be ignored.
2. To assign the same default role as in your website General Settings, set this field to default.
3. If you are not sure, leave this field to either wslnorole or blank (omitting the role will create a users with "No Role For This Site").
5. Filters by emails domains name
Restrict registration to a limited number of domains name.
Note that filtration domains name takes priority over filtration by e-mails addresses and profile urls.
Insert one domain address per line and try to keep this list short (ex: gmail.com, without '@'). On Bounce text insert the text you want to display for rejected users.
6. Filters by e-mails addresses
Restrict registration to a limited number of emails addresses.
Note that filtration e-mails addresses takes priority over filtration by profile urls.
Insert one email address per line and try to keep this list short (ex: hybridauth@gmail.com). On Bounce text insert the text you want to display for rejected users.
7. Filters by profile urls
Restrict registration to a limited number of profile urls.
Note: Some providers like Facebook can have multiples profiles URLs per user and WSL won't be able to recognize all them.
Insert one URL per line and try to keep this list short (ex: https://twitter.com/HybridAuth, https://plus.google.com/u/0/108839241301472312344). On Bounce text insert the text you want to display for rejected users.